Search your books here

Sunday, October 19, 2008

TEMPERATURE MEASUREMENT

RTD circuit
RTD


RTD
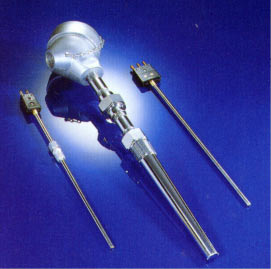
THERMOCUPLE
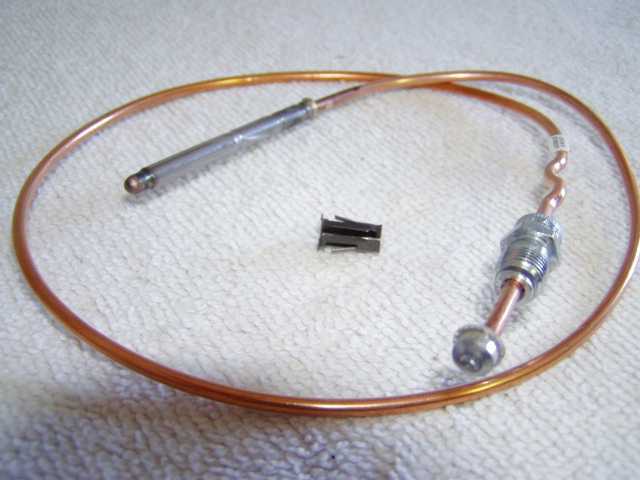
THERMOCOUPLE
THERMOCOUPLE circuit
THERMOCOUPLE BASICS


Temperature measuring devices have been in existence for
centuries. The age-old mercury in glass thermometer is still used today and
why not? The principle of operation is ageless as the device itself. Its
operation was based on the temperature expansion of fluids (mercury or
alcohol). As the temperature increased the fluid in a small reservoir or bulb
expanded and a small column of the fluid was forced up a tube. You will
find the same theory is used in many modern thermostats today. In this
module we will look at the theory and operation of some temperature
measuring devices commonly found in a generating station. These include
thermocouples, thermostats and resistive temperature devices.
Thermocouples (T/C) and resistive temperature devices (RTD) are generally
connected to control logic or instrumentation for continuous monitoring of
temperature. Thermostats are used for direct positive control of the
temperature of a system within preset limits.

Resistance Temperature Detector (RTD)

Every type of metal has a unique composition and has a different resistance
to the flow of electrical current. This is termed the resistively constant for
that metal. For most metals the change in electrical resistance is directly
proportional to its change in temperature and is linear over a range of
temperatures. This constant factor called the temperature coefficient of
electrical resistance (short formed TCR) is the basis of resistance
temperature detectors. The RTD can actually be regarded as a high
precision wire wound resistor whose resistance varies with temperature. By
measuring the resistance of the metal, its temperature can be determined.
Several different pure metals (such as platinum, nickel and copper) can be
used in the manufacture of an RTD. A typical RTD probe contains a coil of
very fine metal wire, allowing for a large resistance change without a great
space requirement. Usually, platinum RTDs are used as process
temperature monitors because of their accuracy and linearity.
To detect the small variations of resistance of the RTD, a temperature
transmitter in the form of a Wheatstone bridge is generally used. The circuit
compares the RTD value with three known and highly accurate resistors.

RTD using a Wheatstone Bridge
A Wheatstone bridge consisting of an RTD, three resistors, a voltmeter and
a voltage source. In this circuit, when the current
flow in the meter is zero (the voltage at point A equals the voltage at point
B) the bridge is said to be in null balance. This would be the zero or set
point on the RTD temperature output. As the RTD temperature increases,
the voltage read by the voltmeter increases. If a voltage transducer replaces
the voltmeter, a 4-20 mA signal, which is proportional to the temperature
range being monitored, can be generated.
As in the case of a thermocouple, a problem arises when the RTD is
installed some distance away from the transmitter. Since the connecting
wires are long, resistance of the wires changes as ambient temperature
fluctuates. The variations in wire resistance would introduce an error in the
transmitter. To eliminate this problem, a three-wire RTD is used.


The connecting wires (w1, w2, w3) are made the same length and therefore
the same resistance. The power supply is connected to one end of the RTD
and the top of the Wheatstone bridge. It can be seen that the resistance of
the right leg of the Wheatstone bridge is R

that the resistances of the wires cancel and therefore the effect of the
connecting wires is eliminated.

RTD Advantages and Disadvantages

Advantages:
• The response time compared to thermocouples is very fast œ in the
order of fractions of a second.
• An RTD will not experience drift problems because it is not self-
powered.
• Within its range it is more accurate and has higher sensitivity than a
thermocouple.
• In an installation where long leads are required, the RTD does not
require special extension cable.
• Unlike thermocouples, radioactive radiation (beta, gamma and
neutrons) has minimal effect on RTDs since the parameter measured
is resistance, not voltage.

Disadvantages:
• Because the metal used for a RTD must be in its purest form, they
are much more expensive than thermocouples.
• In general, an RTD is not capable of measuring as wide a
temperature range as a thermocouple.
• A power supply failure can cause erroneous readings
• Small changes in resistance are being measured, thus all connections
must be tight and free of corrosion, which will create errors.
• Among the many uses in a nuclear station, RTDs can be found in the
reactor area temperature measurement and fuel channel coolant
temperature.

Failure Modes:
• An open circuit in the RTD or in the wiring between the RTD and
the bridge will cause a high temperature reading.
• Loss of power or a short within the RTD will cause a low
temperature reading.

Thermocouple (T/C)

A thermocouple consists of two pieces of dissimilar metals with their ends
joined together (by twisting, soldering or welding). When heat is applied to
the junction, a voltage, in the range of milli-volts (mV), is generated. A
thermocouple is therefore said to be self-powered. Shown in Figure 3 is a
completed thermocouple circuit.

A Thermocouple Circuit
The voltage generated at each junction depends on junction temperature. If
temperature T1 is higher than T2, then the voltage generated at Junction 1
will be higher than that at Junction 2. In the above circuit, the loop current
shown on the galvanometer depends on the relative magnitude of the
voltages at the two junctions.
In order to use a thermocouple to measure process temperature, one end of
the thermocouple has to be kept in contact with the process while the other
end has to be kept at a constant temperature. The end that is in contact with
the process is called the hot or measurement junction. The one that is kept
at constant temperature is called cold or reference junction. The relationship
between total circuit voltage (emf) and the emf at the junctions is:
Circuit emf = Measurement emf - Reference emf
If circuit emf and reference emf are known, measurement emf can be
calculated and the relative temperature determined.
To convert the emf generated by a thermocouple to the standard 4-20 mA
signal, a transmitter is needed. This kind of transmitter is called a
temperature transmitter. 

Simplified Thermocouple Temperature Transmitter
The temperature measurement circuit consists of a
thermocouple connected directly to the temperature transmitter. The hot and
cold junctions can be located wherever required to measure the temperature
difference between the two junctions.
In most situations, we need monitor the temperature rise of equipment to
ensure the safe operation. Temperature rise of a device is the operating
temperature using ambient or room temperature as a reference. To
accomplish this the hot junction is located in or on the device and the cold
junction at the meter or transmitter 

Typical Thermocouple Circuit
Thermocouple Advantages and Disadvantages
Advantages:
• Thermocouples are used on most transformers. The hot junction is
inside the transformer oil and the cold junction at the meter mounted
on the outside. With this simple and rugged installation, the meter
directly reads the temperature rise of oil above the ambient
temperature of the location.
• In general, thermocouples are used exclusively around the turbine
hall because of their rugged construction and low cost.
• A thermocouple is capable of measuring a wider temperature range
than an RTD.

Disadvantages:
• If the thermocouple is located some distance away from the
Note
measuring device, expensive extension grade thermocouple wires or
compensating cables have to be used.
• Thermocouples are not used in areas where high radiation fields are
present (for example, in the reactor vault). Radioactive radiation
(e.g., Beta radiation from neutron activation), will induce a voltage
in the thermocouple wires. Since the signal from thermocouple is
also a voltage, the induced voltage will cause an error in the
temperature transmitter output.
• Thermocouples are slower in response than RTDs
If the control logic is remotely located and temperature transmitters

(milli-volt to milli- amp transducers) are used, a power supply
failure will of course cause faulty readings
.
Failure Modes:
An open circuit in the thermocouple detector means that there is no path for
current flow, thus it will cause a low (off-scale) temperature reading.
A short circuit in the thermocouple detector will also cause a low
temperature reading because it creates a leakage current path to the ground
and a smaller measured voltage.


Thermal Wells
The process environment where temperature monitoring is required, is often
not only hot, but also pressurized and possibly chemically corrosive or
radioactive. To facilitate removal of the temperature sensors (RTD and TC),
for examination or replacement and to provide mechanical protection, the
sensors are usually mounted inside thermal wells 


Saturday, October 4, 2008

LEVEL MEASUREMENT


Three valve manifold


Bubbler method
Accurate continuous measurement of volume of fluid in containers has
always been a challenge to industry. This is even more so in the nuclear
station environment where the fluid could be acidic/caustic or under very
high pressure/temperature. We will now examine the measurement of fluid
level in vessels and the effect of temperature and pressure on this
measurement. We will also consider the operating environment on the
measurement and the possible modes of device failure.

 Level Measurement Basics

Very simple systems employ external sight glasses or tubes to view the
height and hence the volume of the fluid. Others utilize floats connected to
variable potentiometers or rheostats that will change the resistance
according to the amount of motion of the float. This signal is then inputted
to transmitters that send a signal to an instrument calibrated to read out the
height or volume.
In this module, we will examine the more challenging situations that require
inferential level measurement. This technique obtains a level indication
indirectly by monitoring the pressure exerted by the height of the liquid in
the vessel.
The pressure at the base of a vessel containing liquid is directly proportional
to the height of the liquid in the vessel. This is termed hydrostatic pressure.
As the level in the vessel rises, the pressure exerted by the liquid at the base
of the vessel will increase linearly. Mathematically, we have:
The level of liquid inside a tank can be determined from the pressure
reading if the weight density of the liquid is constant.
Differential Pressure (DP) capsules 
These are the most commonly used devices to
measure the pressure at the base of a tank.
When a DP transmitter is used for the purpose of measuring a level, it will
be called a level transmitter.
To obtain maximum sensitivity, a pressure capsule has to be used, that has a
sensitivity range that closely matches the anticipated pressure of the
measured liquid. However, system pressures are often much higher than the
actual hydrostatic pressure that is to be measured. If the process pressure is
accidentally applied to only one side of the DP capsule during installation or
removal of the DP cell from service, over ranging of the capsule would
occur and the capsule could be damaged causing erroneous indications.

 Three Valve Manifold
A three-valve manifold is a device that is used to ensure that the capsule will
not be over-ranged. It also allows isolation of the transmitter from the
process loop. It consists of two block valves - high pressure and low-
pressure block valve - and an equalizing valve
During normal operation, the equalizing valve is closed and the two block
valves are open. When the transmitter is put into or removed from service,
the valves must be operated in such a manner that very high pressure is
never applied to only one side of the DP capsule.

To valve a DP transmitter into service an operator would perform the
following steps:
1.Check all valves closed.
2.Open the equalizing valve œ this ensures that the same
pressure will be applied to both sides of the transmitter, i.e.,
zero differential pressure.
3.Open the High Pressure block valve slowly, check for
leakage from both the high pressure and low-pressure side of
the transmitter.
4.Close the equalizing valve œ this locks the pressure on both
sides of the transmitter.
5.Open the low-pressure block valve to apply process pressure
to the low-pressure side of the transmitter and establish the
working differential pressure.
6.The transmitter is now in service.
Note it may be necessary to bleed any trapped air from the capsule housing.

 Open Tank Measurement
The simplest application is the fluid level in an open tank. 
typical open tank level measurement installation using a pressure capsule
level transmitter.
Open Tank Level Measurement Installation
If the tank is open to atmosphere, the high-pressure side of the level
transmitter will be connected to the base of the tank while the low-pressure
side will be vented to atmosphere. In this manner, the level transmitter acts
as a simple pressure transmitter. We have:         
Phigh = Patm +SH
                                                                                                                 Plow = Patm
Differential pressure  
                                                  P = Phigh - Plow =SH
The level transmitter can be calibrated to output 4 mA when the tank is at
0% level and 20 mA when the tank is at 100% level.

 
Closed Tank Measurement
Should the tank be closed and a gas or vapour exists on top of the liquid, the
gas pressure must be compensated for. A change in the gas pressure will
cause a change in transmitter output. Moreover, the pressure exerted by the
gas phase may be so high that the hydrostatic pressure of the liquid column
becomes insignificant. For example, the measured hydrostatic head in a
CANDU boiler may be only three meters (30 kPa) or so, whereas the steam
pressure is typically 5 MPa. Compensation can be achieved by applying the
gas pressure to both the high and low-pressure sides of the level transmitter.
This cover gas pressure is thus used as a back pressure or reference pressure
on the LP side of the DP cell. One can also immediately see the need for the
three-valve manifold to protect the DP cell against these pressures.


Typical Closed Tank Level Measurement System
We have:
                          
   Phigh = Pgas +SH
                                Plow = Pgas
                            P = Phigh - Plow =SH
The effect of the gas pressure is cancelled and only the pressure due to the
hydrostatic head of the liquid is sensed. When the low-pressure impulse line
is connected directly to the gas phase above the liquid level, it is called a dry
leg.

Bubbler Level Measurement System in Open Tank Application

A bubbler tube is immersed to the bottom of the
vessel in which the liquid level is to be measured. A gas (called purge gas)
is allowed to pass through the bubbler tube. Consider that the tank is empty.
In this case, the gas will escape freely at the end of the tube and therefore
the gas pressure inside the bubbler tube (called back pressure) will be at
atmospheric pressure. However, as the liquid level inside the tank increases,
pressure exerted by the liquid at the base of the tank (and at the opening of
the bubbler tube) increases. The hydrostatic pressure of the liquid in effect
acts as a seal, which restricts the escape of, purge gas from the bubbler tube.
As a result, the gas pressure in the bubbler tube will continue to increase
until it just balances the hydrostatic pressure (P =SH ) of the liquid. At
this point the backpressure in the bubbler tube is exactly the same as the
hydrostatic pressure of the liquid and it will remain constant until any
change in the liquid level occurs. Any excess supply pressure will escape as
bubbles through the liquid.
As the liquid level rises, the backpressure in the bubbler tube increases
proportionally, since the density of the liquid is constant.
A level transmitter (DP cell) can be used to monitor this backpressure. In an
open tank installation, the bubbler tube is connected to the high-pressure
side of the transmitter, while the low pressure side is vented to atmosphere.
The output of the transmitter will be proportional to the tank level.

A constant differential pressure relay is often used in the purge gas line to
ensure that constant bubbling action occurs at all tank levels. The constant
differential pressure relay maintains a constant flow rate of purge gas in the
bubbler tube regardless of tank level variations or supply fluctuation. This
ensures that bubbling will occur to maximum tank level and the flow rate
does not increase at low tank level in such a way as to cause excessive
disturbances at the surface of the liquid. Note that bubbling action has to be
continuous or the measurement signal will not be accurate.
An additional advantage of the bubbler system is that, since it measures only
the backpressure of the purge gas, the exact location of the level transmitter
is not important. The transmitter can be mounted some distance from the
process. Open loop bubblers are used to measure levels in spent fuel bays.

Closed Tank Application for Bubbler System

If the bubbler system is to be applied to measure level in a closed tank, some
pressure-regulating scheme must be provided for the gas space in the tank.
Otherwise, the gas bubbling through the liquid will pressurize the gas space
to a point where bubbler supply pressure cannot overcome the static
pressure it acts against. The result would be no bubble flow and, therefore,
inaccurate measurement signal. Also, as in the case of a closed tank
inferential level measurement system, the low-pressure side of the level
transmitter has to be connected to the gas space in order to compensate for
the effect of gas pressure.
Some typical examples of closed tank application of bubbler systems are the
measurement of water level in the irradiated fuel bays and the light water
level in the liquid zone control tanks.

 
Effect of Temperature on Level Measurement
Level measurement systems that use differential pressure P as the sensing
method, are by their very nature affected by temperature and pressure.
Recall that the measured height H of a column of liquid is directly
proportional to the pressure P exerted at the base of the column and
inversely proportional to the density of the liquid.
Thus, for any given amount of liquid in a container, the pressure P exerted at
the base will remain constant, but the height will vary directly with the
temperature.

 Effect of Pressure on Level Measurement
Level measurement systems that use differential pressure P as the sensing
method, are also affected by pressure, although not to the same degree as
temperature mentioned in the previous section.
Again the measured height H of a column of liquid is directly proportional
to the pressure P exerted at the base of the column by the liquid and L
inversely proportional to the density of the liquid: H a P/L
Density (mass per unit volume) of a liquid or gas is directly proportional to
the process or system pressure Ps.a Ps
Thus, for any given amount of liquid in a container, the pressure  
P(liquidpressure) exerted at the base of the container by the liquid 
will remain constant, but the height will vary inversely with the process 
r systempressure.H a 1/Ps
Most liquids are fairly incompressible and the process pressure will not
affect the level unless there is significant vapour content.

 
Level Measurement System Errors
The level measurement techniques described in this module use inferred
processes and not direct measurements. Namely, the indication of fluid level
is based on the pressure exerted on a differential pressure (DP) cell by the
height of the liquid in the vessel. This places great importance on the
physical and environmental problems that can affect the accuracy of this
indirect measurement.

Connections
As amusing as it may sound, many avoidable errors occur because the DP
cell had the sensing line connections reversed.
In systems that have high operating pressure but low hydrostatic pressure
due to weight of the fluid, this is easy to occur. This is particularly important
for closed tank systems.
With an incorrectly connected DP cell the indicated level would go down
while the true tank level increases.

Over-Pressuring
Three valve manifolds are provided on DP cells to prevent over-pressuring
and aid in the removal of cells for maintenance. Incorrect procedures can
inadvertently over-pressure the differential pressure cell. If the cell does not
fail immediately the internal diaphragm may become distorted. The
measurements could read either high or low depending on the mode of
failure.
Note that if the equalizing valve on the three-valve manifold is inadvertently
opened, the level indication will of course drop to a very low level as the
pressure across the DP cell equalizes.

Sensing lines
The sensing lines are the umbilical cord to the DP cell and must be
functioning correctly. Some of the errors that can occur are:
Obstructed sensing lines
The small diameter lines can become clogged with particulate, with
resulting inaccurate readings. Sometimes the problem is first noted as an
unusually sluggish response to a predicted change in level. Periodic draining
and flushing of sensing lines is a must.

Draining sensing lines
As mentioned previously, the lines must be drained to remove any debris or
particulate that may settle to the bottom of the tank and in the line. Also, in
closed tank dry leg systems, condensate must be removed regularly to
prevent fluid pressure building up on the low-pressure impulse line. Failure
to do so will of course give a low tank level reading. Procedural care must
be exercised to ensure the DP cell is not over-ranged inadvertently during
draining. Such could happen if the block valves are not closed and
equalizing valve opened beforehand.
False high level indication can be caused by a leaking or drained wet leg.
A leaking variable (process) leg can cause false low-level indication.

Wednesday, October 1, 2008

4.FLOW MEASUREMENT


HIGH PRESSURE VENTURI TUBE


Flow Detectors

To measure the rate of flow by the differential pressure method, some form
of restriction is placed in the pipeline to create a pressure drop. Since flow in
the pipe must pass through a reduced area, the pressure before the restriction
is higher than after or downstream. Such a reduction in pressure will cause
an increase in the fluid velocity because the same amount of flow must take
place before the restriction as after it. Velocity will vary directly with the
flow and as the flow increases a greater pressure differential will occur
across the restriction. So by measuring the differential pressure across a
restriction, one can measure the rate of flow.

Orifice Plate
The orifice plate is the most common form of restriction that is used in flow
measurement. An orifice plate is basically a thin metal plate with a hole
bored in the center. It has a tab on one side where the specification of the
plate is stamped. The upstream side of the orifice plate usually has a sharp,
edge.

When an orifice plate is installed in a flow line (usually clamped between a
pair of flanges), increase of fluid flow velocity through the reduced area at
the orifice develops a differential pressure across the orifice. This pressure is
a function of flow rate.
With an orifice plate in the pipe work, static pressure increases slightly
upstream of the orifice (due to back pressure effect) and then decreases
sharply as the flow passes through the orifice, reaching a minimum at a
point called the vena contracta where the velocity of the flow is at a
maximum. Beyond this point, static pressure starts to recover as the flow
slows down. However, with an orifice plate, static pressure downstream is
always considerably lower than the upstream pressure. In addition some
pressure energy is converted to sound and heat due to friction and
turbulence at the orifice plate. The measured differential pressuredeveloped
by an orifice plate also depends on the location of the pressure sensing points
or pressure taps.


Flange Taps
Flange taps are the most widely used pressure tapping location for orifices.
They are holes bored through the flanges, located one inch upstream and one
inch downstream from the respective faces of the orifice plate.
The upstream and downstream sides of the orifice plate are connected to the
high pressure and low-pressure sides of a DP transmitter. A pressure transmitter,
when installed to measure flow, can be called a flow transmitter. As in the case of level measurement,the static pressure in the pipe-work could be many times higher than the
differential pressure created by the orifice plate.

Vena Contracta Taps
Vena contracta taps are located one pipe inner diameter upstream and at the
point of minimum pressure, usually one half pipe inner diameter

Pipe Taps
Pipe taps are located two and a half pipe inner diameters upstream and eight
pipe inner diameters downstream.
When an orifice plate is used with one of the standardized pressure tap
locations, an on-location calibration of the flow transmitter is not necessary.
Once the ratio and the kind of pressure tap to be used are decided, there are
empirically derived charts and tables available to facilitate calibration.

Advantages and Disadvantages of Orifice Plates
Advantages of orifice plates include:

• High differential pressure generated
• Exhaustive data available
• Low purchase price and installation cost
• Easy replacement

Disadvantages include:

• High permanent pressure loss implies higher pumping cost.
• Cannot be used on dirty fluids, slurries or wet steam as erosion will
alter the differential pressure generated by the orifice plate.

Venturi Tubes
For applications where high permanent pressure loss is not tolerable, a
venturi tube can be used. Because of its gradually curved inlet
and outlet cones, almost no permanent pressure drop occurs. This design
also minimizes wear and plugging by allowing the flow to sweep suspended
solids through without obstruction.

Venturi tube disadvantages:

• Calculated calibration figures are less accurate than for orifice plates.
For greater accuracy, each individual Venturi tube has to be flow
calibrated by passing known flows through the Venturi and
recording the resulting differential pressures.
• The differential pressure generated by a venturi tube is lower than
for an orifice plate and, therefore, a high sensitivity flow transmitter
is needed.
• It is more bulky and more expensive.

One application of the Venturi tube is the measurement of
flow in the primary heat transport system. Together with the temperature
change across these fuel channels, thermal power of the reactor can be
calculated.

Flow Nozzle
A flow nozzle is also called a half venturi.
The flow nozzle has properties between an orifice plate and a venturi.
Because of its streamlined contour, the flow nozzle has a lower permanent
pressure loss than an orifice plate (but higher than a venturi). The
differential it generates is also lower than an orifice plate (but again higher
than the venturi tube). They are also less expensive than the venturi tubes.
Flow nozzles are widely used for flow measurements at high velocities.
They are more rugged and more resistant to erosion than the sharp-edged
orifice plate. An example use of flow nozzles are the measurement of flow
in the feed and bleed lines of the PHT system.

Elbow Taps
Centrifugal force generated by a fluid flowing through an elbow can be used
to measure fluid flow. As fluid goes around an elbow, a high-pressure area
appears on the outer face of the elbow. If a flow transmitter is used to sense
this high pressure and the lower pressure at the inner face of the elbow, flow
rate can be measured.
One use of elbow taps is the measurement of steam flow from the boilers,
where the large volume of saturated steam at high pressure and temperature
could cause an erosion problem for other primary devices.
Another advantage is that the elbows are often already in the regular piping
configuration so no additional pressure loss is introduced.

Pitot Tubes
Pitot tubes also utilize the principles captured in Bernoulli‘s equation, to
measure flow. Most pitot tubes actually consist of two tubes. One, the low-
pressure tube measures the static pressure in the pipe. The second, the high-
pressure tube is inserted in the pipe in such a way that the flowing fluid is
stopped in the tube. The pressure in the high-pressure tube will be the static
pressure in the system plus a pressure dependant on the force required
stopping the flow.
Pitot tubes are more common measuring gas flows that liquid flows. They
suffer from a couple of problems.The pressure differential is usually small
and hard to measure.
The differing flow velocities across the pipe make the accuracy dependent
on the flow profile of the fluid and the position of the pitot in the pipe.

Annubar
An annubar is very similar to a pitot tube. The difference is that there is
more than one hole into the pressure measuring chambers. The pressure in
the high-pressure chamber represents an average of the velocity across the
pipe. Annubars are more accurate than pitots as they are not as position
sensitive or as sensitive to the velocity profile of the fluid.

Flow Measurement Errors

We have already discussed the pros and cons of each type of flow detector
commonly found in a generating station. Some, such as the orifice, are more
prone to damage by particulate or saturated steam then others. However,
there are common areas where the flow readings can be inaccurate or
invalid.

Erosion
Particulate, suspended solids or debris in the piping will not only plug up the
sensing lines, it will erode the sensing device. The orifice, by its design with
a thin, sharp edge is most affected, but the flow nozzle and even venturi can
also be damaged. As the material wears away, the differential pressure
between the high and low sides of the sensor will drop and the flow reading
will decrease.

Over ranging Damage to the D/P Cell
Again, as previously described, the system pressures are usually much
greater than the differential pressure and three valve manifolds must be
correctly used.

Vapour Formation in the Throat
D/P flow sensors operate on the relation between velocity and pressure. As
gas requires less pressure to compress, there is a greater pressure differential
across the D/P cell when the gas expands on the LP side of the sensor. The
flow sensor will indicate a higher flow rate than there actually is. The
turbulence created at the LP side of the sensor will also make the reading
somewhat unstable. A small amount of gas or vapour will make a large
difference in the indicated flow rate.
The opposite can occur if the vapour forms in the HP side of the sensor due
to cavitation or gas pockets when the fluid approaches the boiling point. In
such an instance there will be a fluctuating pressure drop across the D/P cell
that will give an erroneously low (or even negative) D/P reading.

Clogging of Throat
Particulate or suspended solids can damage the flow sensor by the high
velocities wearing at the flow sensor surfaces. Also, the build-up of material
in the throat of the sensor increases the differential pressure across the cell.
The error in flow measurement will increase as the flow increases.
Plugged or Leaking Sensing Lines
The effects of plugged or leaking D/P sensing lines is the same as described
in previous modules, however the effects are more pronounced with the
possible low differential pressures. Periodic maintenance and bleeding of
the sensing lines is a must. The instrument error will depend on where the
plug/leak is:
On the HP side a plugged or leaking sensing line will cause a lower reading.
The reading will become irrational if the LP pressure equals or exceeds the
HP sensing pressure.
On the LP side a plugged or leaking sensing line will cause a higher reading.

search your books here